WebAgent 私有化部署用户指导书
本指导书旨在帮助用户完成 WebAgent 私有化部署软件包的本地启动、Web 应用集成以及线上部署等操作。所提供的软件包为 zip 格式,例如:webagent-private-deployment-v1.0.0-20251106_202724.zip。
目录:
1 本地开发
本文以 Windows 操作系统为例,使用 Git Bash 命令行工具进行说明。Node.js 版本需满足 ≥ 22.0.0,可通过以下命令确认版本:
node -v如版本不符合要求,请前往 Node.js 官网 下载并安装符合要求的版本。
1.1 启动 WebAgent 服务
1.1.1 解压软件包
请将 zip 压缩包解压至本地目录,例如:webagent-private-deployment,并进入该目录:
cd webagent-private-deployment1.1.2 配置环境变量
复制环境变量模板文件:
cp example.env .env编辑 .env 文件,修改如下内容:
-CORS_ORIGIN=http://localhost:3000
+CORS_ORIGIN=http://localhost:5173
注:
- 减号(-)后面的内容是需要删除的,加号(+)后面的内容是需要增加的。
http://localhost:5173为本地前端应用的访问地址。
1.1.3 启动服务
首先安装 dotenv-cli 工具:
npm i -g dotenv-cli然后执行以下命令启动 WebAgent 服务:
npx dotenv -e .env -- node index.js若控制台输出如下信息,表示服务启动成功:

注意:WebAgent 服务需保持运行状态,请勿关闭终端窗口。若已安装 pm2,也可使用以下命令在后台运行:
pm2 start index.js --name webagent --env production1.2 Web 应用智能化集成
以基于 Vite + Vue 构建的前端项目为例(可通过 npm create vite my-project 创建),需集成 NEXT-SDKs 并连接 WebAgent 服务。
1.2.1 安装依赖
在项目目录下执行以下命令安装所需依赖:
npm i @opentiny/next-sdk @opentiny/next-remoter1.2.2 定义 MCP Client 并连接 WebAgent
在应用的主入口文件(比如:src/App.vue)中添加如下代码:
注意:START 和 END 标识中间的内容是需要增加的。
<script setup lang="ts">
import HelloWorld from './components/HelloWorld.vue'

// START: 新增内容
import { onMounted, ref, provide } from 'vue'
import { createMessageChannelPairTransport, WebMcpClient } from '@opentiny/next-sdk'
import { TinyRemoter } from '@opentiny/next-remoter'
import '@opentiny/next-remoter/dist/style.css'

const sessionId = ref('')
const [serverTransport, clientTransport] = createMessageChannelPairTransport()
provide('serverTransport', serverTransport)

onMounted(async () => {
  // 创建 WebMcpClient ,并与 WebAgent 连接
  const client = new WebMcpClient()
  await client.connect(clientTransport)
  const { sessionId: sessionID } = await client.connect({
    agent: true,

    // sessionId 为可选参数。若传入该参数,系统将使用指定值作为会话标识;若未传入,WebAgent 服务将自动生成一个随机的字符串作为 sessionId。为便于通过 MCP Inspector 工具进行调试,此处采用了固定的 sessionId。用户亦可通过浏览器原生提供的 crypto.randomUUID() 方法生成随机字符串作为会话标识。
    sessionId: 'd299a869-c674-4125-a84b-bb4e24079b99',

    url: 'http://localhost:3000/api/v1/webmcp/mcp'
  })
  sessionId.value = sessionID
  console.log('sessionId:', sessionId.value)
})
// END: 新增内容
</script>

<template>
  <div>
    <a href="https://vitejs.dev" target="_blank">
      <img src="/vite.svg" class="logo" alt="Vite logo" />
    </a>
    <a href="https://vuejs.org/" target="_blank">
      <img src="./assets/vue.svg" class="logo vue" alt="Vue logo" />
    </a>
  </div>
  <HelloWorld msg="Vite + Vue" />
  <!-- START: 新增内容 -->
  <tiny-remoter
    agent-root="http://localhost:3000/api/v1/webmcp/"
    :session-id="sessionId"
    :menuItems="[
      {
        action: 'qr-code',
        show: false
      },
      {
        action: 'remote-control',
        show: false
      },
      {
        action: 'remote-url',
        show: false
      }
    ]"
  />
  <!-- END: 新增内容 -->
</template>
1.2.3 定义 MCP Server
在应用的子页面(比如:src/components/HelloWorld.vue)中添加如下代码:
注意:START 和 END 标识中间的内容是需要增加的。
<script setup lang="ts">
import { ref } from 'vue'
defineProps<{ msg: string }>()
const count = ref(0)
// START: 新增内容
import { onMounted, inject } from 'vue'
import { WebMcpServer, z } from '@opentiny/next-sdk'
onMounted(async () => {
// 创建 WebMcpServer ,并与 ServerTransport 连接
const server = new WebMcpServer({
name: 'mcp-server-hello-world',
version: '1.0.0'
})
server.registerTool(
'counter',
{
title: '自增一个数字',
description: '在现有数字基础上自增一个数值,起始数字是:0,不要问我起始数字是什么,直接调用工具完成自增即可',
inputSchema: { number: z.number() }
},
async ({ number }) => {
console.log('number:', number)
count.value += number
return { content: [{ type: 'text', text: `收到: ${count.value}` }] }
}
)
const serverTransport = inject('serverTransport')
await server.connect(serverTransport)
})
// END: 新增内容
</script>
<template>
<h1>{{ msg }}</h1>
<div class="card">
<button type="button" @click="count++">count is {{ count }}</button>
<p>
Edit
<code>components/HelloWorld.vue</code> to test HMR
</p>
</div>
<p>
Check out
<a href="https://vuejs.org/guide/quick-start.html#local" target="_blank"
>create-vue</a
>, the official Vue + Vite starter
</p>
<p>
Install
<a href="https://github.com/vuejs/language-tools" target="_blank">Volar</a>
in your IDE for a better DX
</p>
<p class="read-the-docs">Click on the Vite and Vue logos to learn more</p>
</template>
<style scoped>
.read-the-docs {
color: #888;
}
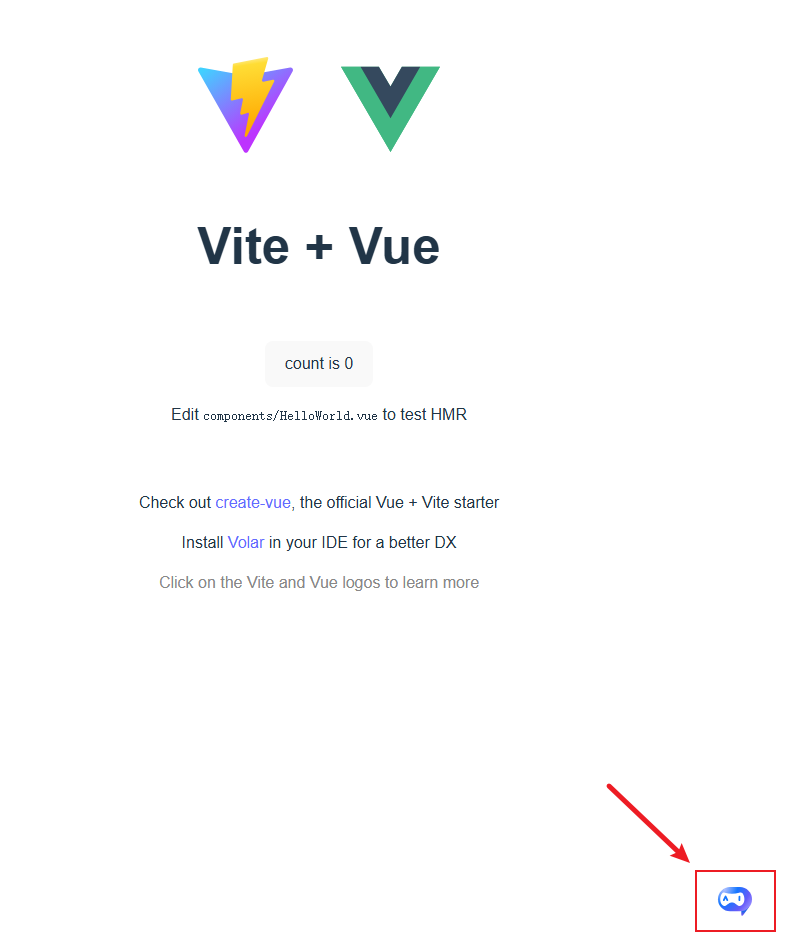
</style>若页面右下角出现 AI 智能助手图标,表示连接成功。
参考文档:https://docs.opentiny.design/next-sdk/guide/
1.3 本地调试
完成集成后,可通过以下两种方式进行调试:
- 使用 MCP Inspector 手动调用 MCP 工具;
- 使用 NEXT Remoter 组件,通过自然语言调用 MCP 工具。
1.3.1 使用 MCP Inspector 调试
MCP Inspector 是 MCP 官方提供的一款用于测试和调试 MCP 服务器的交互式开发工具,支持查看和调用 MCP 工具。
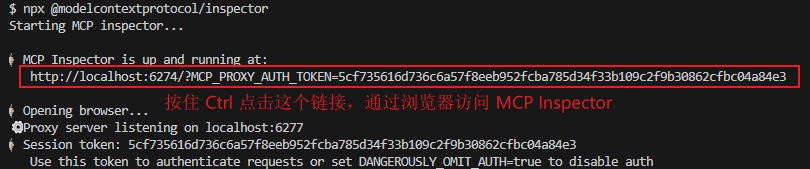
执行以下命令启动 Inspector:
npx @modelcontextprotocol/inspector启动成功后,浏览器将自动打开调试页面(如未自动打开,可手动访问 http://localhost:6274)。
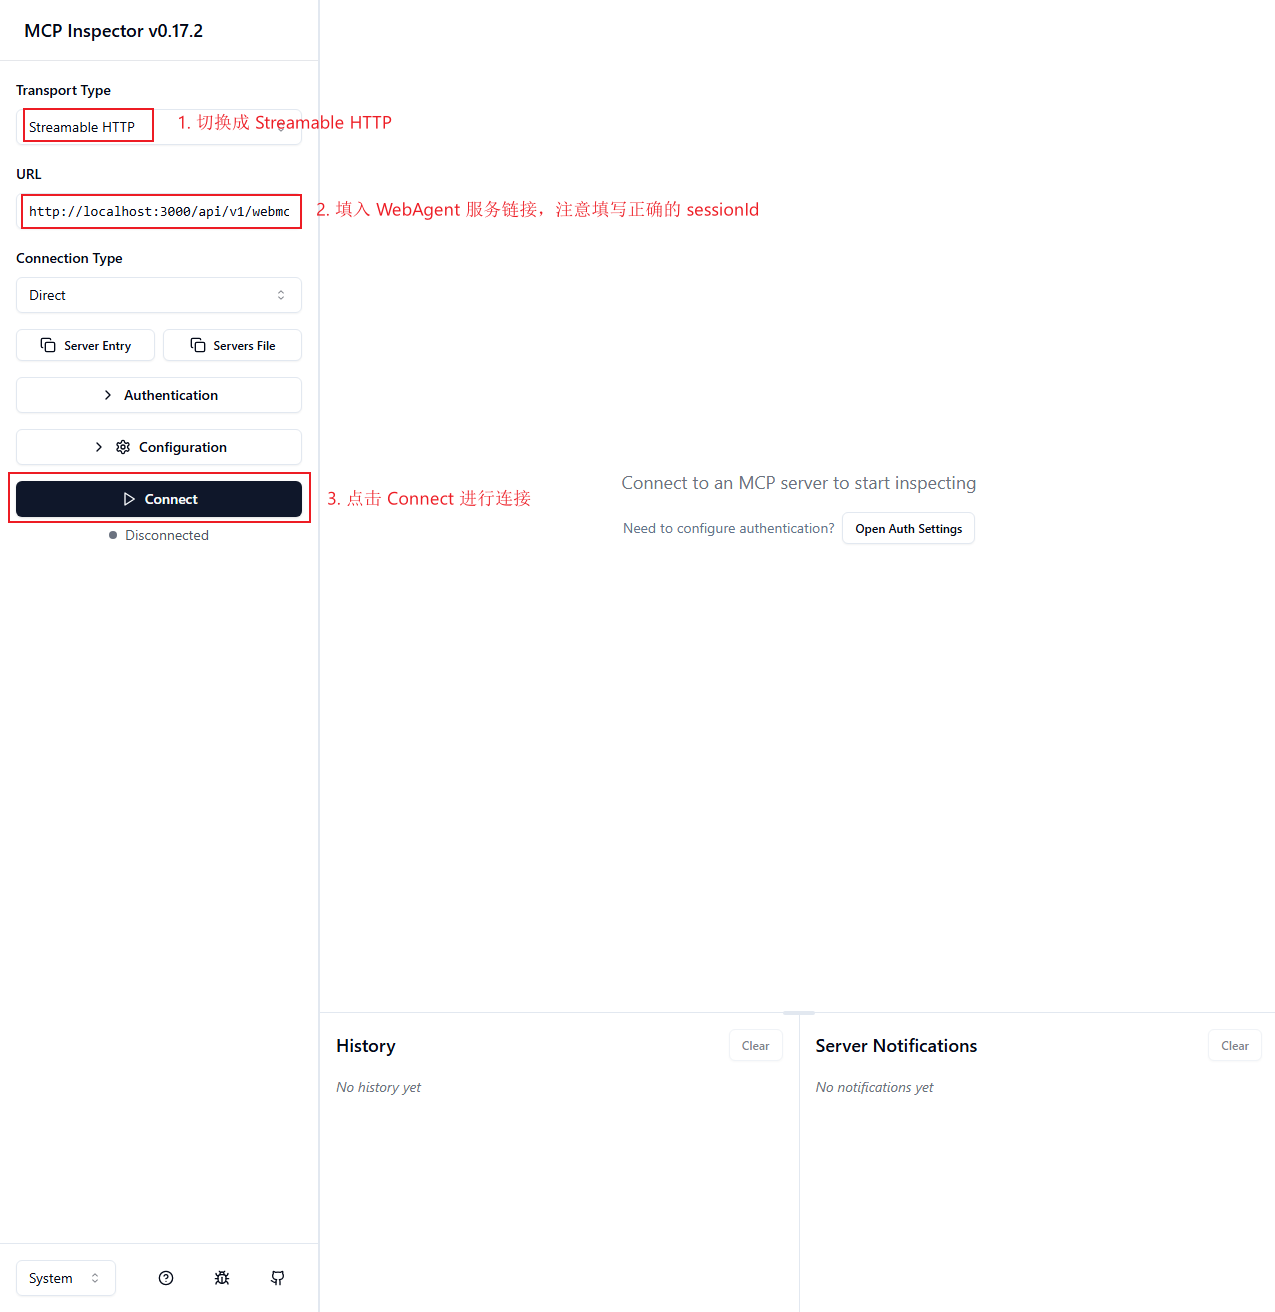
配置参数如下:
- Transport Type: Streamable HTTP
- URL:
http://localhost:3000/api/v1/webmcp/mcp?sessionId=d299a869-c674-4125-a84b-bb4e24079b99
注意:这里的 sessionId 是连接 WebAgent 之后返回的 sessionId(可以 F12 打开浏览器控制台进行查看)。
点击“Connect”按钮连接。
连接成功后,可在 Tools 标签页中查看并调用定义的 MCP 工具。
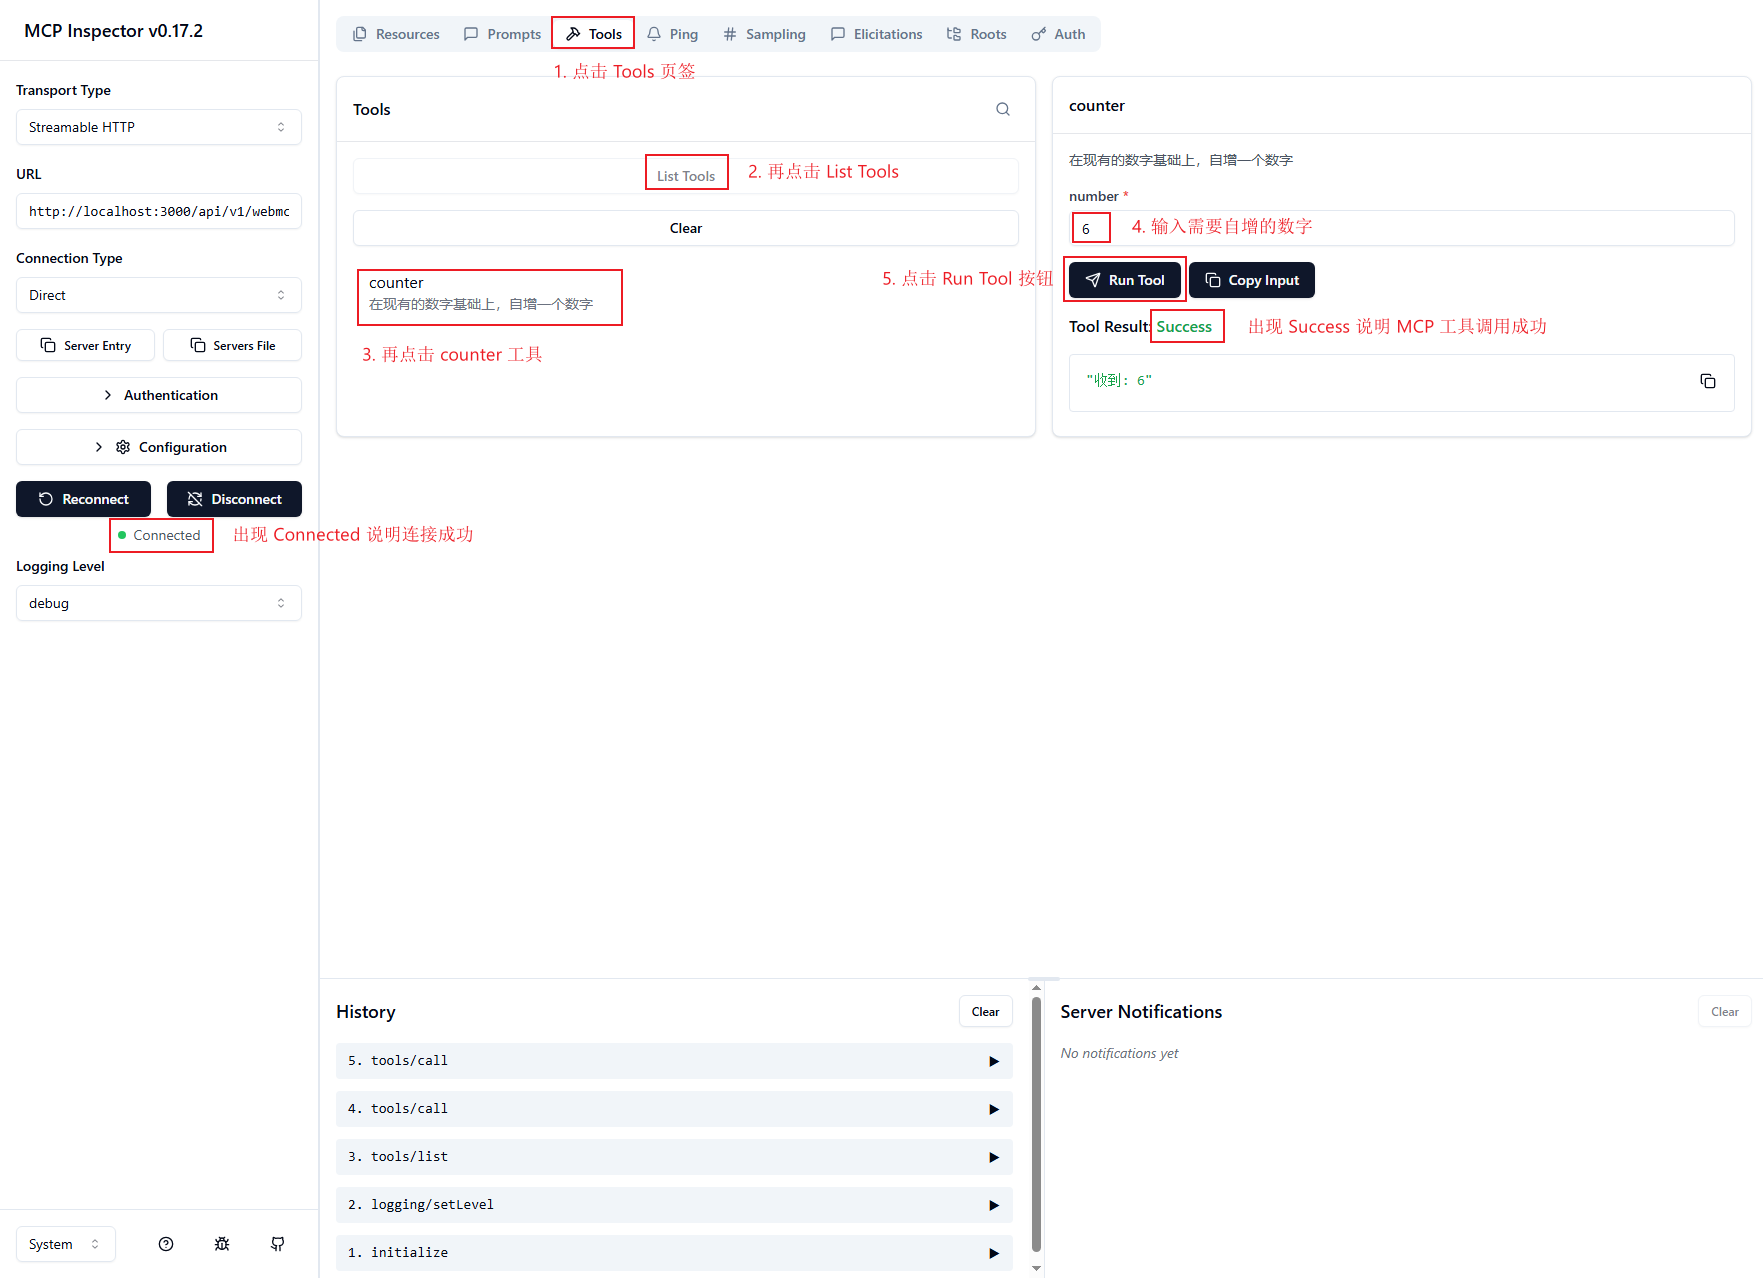
演示动画:
上述动画展示了如何配置 WebAgent 服务的访问地址,并通过 MCP Inspector 工具建立连接。在 Inspector 中可查看 Web 应用中所定义的 MCP 工具,手动调用 counter 工具以执行数字自增操作,并观察其执行结果。
初始状态下,页面中显示的数值为 0。首次调用 counter 工具并传入参数 6 后,页面数值更新为 6(即 0 + 6);再次调用该工具并传入参数 8 后,页面数值更新为 14(即 6 + 8)。
1.3.2 使用 NEXT Remoter 组件进行调试
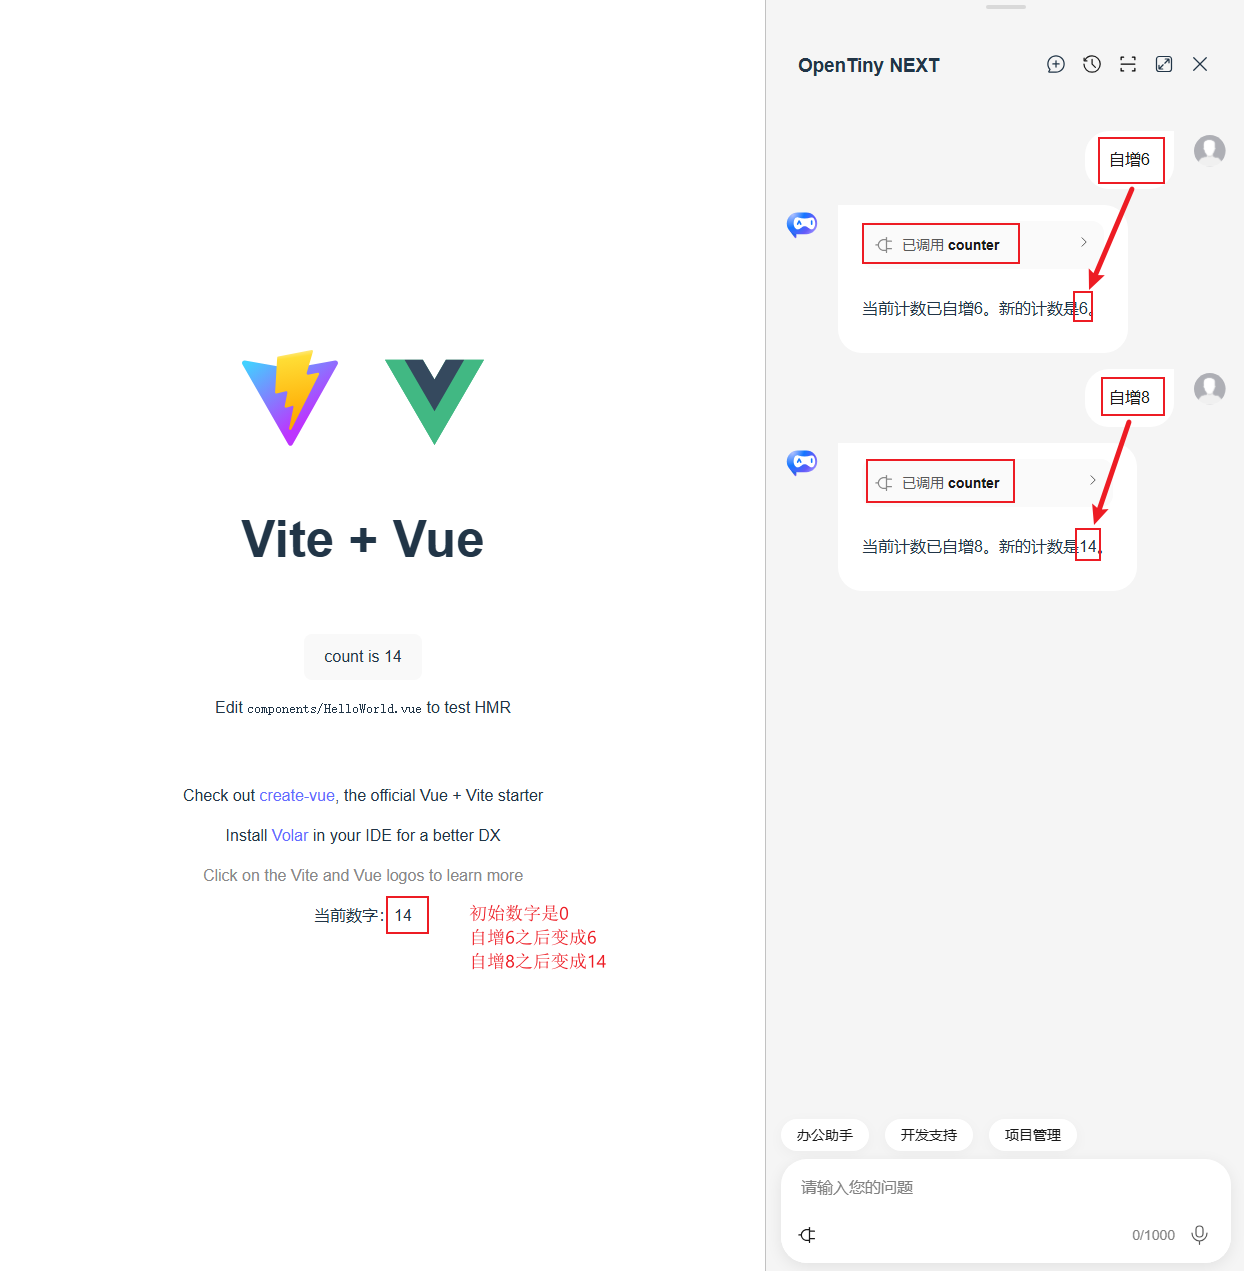
点击页面右下角的 AI 助手图标,打开对话框。
在输入框中使用自然语言描述操作,例如:“自增6”,AI Agent 将自动调用 MCP 工具完成操作。
演示动画:

上述动画演示了通过点击页面右下角图标唤醒 AI 智能助手,并在对话框中输入自然语言指令,使 AI Agent 调用相应的 MCP 工具,从而实现对 Web 应用的自动化操作,提升任务执行效率。
页面初始状态显示数值为 0。首次在对话框中输入“自增6”后,AI Agent 调用 MCP 工具,页面数值变为 6(即 0 + 6);再次输入“自增8”后,数值更新为 14(即 6 + 8)。
2 线上部署
本地调试完成后,可将服务部署至 Linux 服务器。以下步骤以 pm2 为例进行管理。
服务器需安装 Node.js(版本 ≥ 22.0.0)
2.1 安装 pm2
npm i -g pm22.2 解压软件包
unzip webagent-private-deployment-v1.0.0-20251106_202724.zip -d webagent-private-deployment2.3 配置环境变量
cp example.env .env修改 .env 文件:
-CORS_ORIGIN=http://localhost:5173
+CORS_ORIGIN=https://ai.opentiny.design
注:
https://ai.opentiny.design为线上前端域名。
2.4 启动 WebAgent 服务
pm2 start index.js --name webagent --env production若控制台出现以下界面,表示启动成功。

常用 pm2 命令:
pm2 status           # 查看进程状态
pm2 restart webagent # 重启 WebAgent
2.5 配置 Nginx 反向代理
为实现前端应用域名与 WebAgent 服务端口的正确映射,并确保前端对接口调用时不会出现跨域或路径错误,需在 Nginx 配置文件中添加以下内容:
location /api/ {
  proxy_buffering off;
  proxy_read_timeout 3600s;
  proxy_http_version 1.1;
  proxy_set_header X-Forwarded-Proto $scheme;
  proxy_set_header Host $Host;
  proxy_set_header X-Real-IP $remote_addr;
  proxy_set_header X-Forwarded-For $proxy_add_x_forwarded_for;
  proxy_set_header X-NginX-Proxy true;
  proxy_pass http://127.0.0.1:3000; // 注意末尾没有 /
}
2.6 修改前端配置
将前端代码中的本地地址替换为线上地址:
src/App.vue
- url: 'http://localhost:3000/api/v1/webmcp/mcp'
+ url: 'https://ai.opentiny.design/api/v1/webmcp/mcp'

- agent-root="http://localhost:3000/api/v1/webmcp/"
+ agent-root="https://ai.opentiny.design/api/v1/webmcp/"
至此,WebAgent 私有化部署的本地开发与线上部署流程已全部完成。
如需进一步技术支持,请参考官方文档或联系 OpenTiny 小助手(微信号:opentiny-official)。